A water heater can keep producing hot water even when a layer of sediment is building at the bottom of the tank. That buildup can cause popping or rumbling sounds, reduce available hot water, and make the unit work harder than it should. Knowing how to flush water heaters gives homeowners a useful maintenance option, but the job needs to be done carefully. A stuck drain valve, a leaking connection, or an older tank with heavy corrosion can turn a simple task into a plumbing repair.
This guide applies to conventional storage-tank water heaters. Tankless water heaters need a different descaling process using isolation valves and a cleaning solution designed for the unit.
Why Flushing a Water Heater Can Help
Most water contains minerals and small particles. As water is heated inside a tank, these materials settle to the bottom. Over time, that sediment can harden into a dense layer. In homes with hard water, well water, or changing water conditions, buildup may happen faster.
Sediment creates a barrier between the burner or heating elements and the water. Gas-fired tanks may make a crackling, popping, or rumbling sound as water pushes through the deposit. Electric units may take longer to recover because sediment can interfere with heat transfer around the lower element. Either way, the tank can lose efficiency and experience added wear.
A routine flush helps remove loose sediment before it becomes heavily compacted. It will not repair a corroded tank, a failed heating element, a faulty gas control, or a damaged dip tube. If the water heater is leaking from the body of the tank, flushing is not the solution.
When Should You Flush a Water Heater?
For many homes, flushing a tank about once a year is a reasonable maintenance schedule. The right interval depends on the water supply, the heater’s age, and how much hot water the household uses. A home with hard water may benefit from more frequent attention, while a newer tank with minimal sediment may not need an aggressive flush every year.
Pay attention to changes in performance. Noises from the tank, less hot water than usual, cloudy water from hot-only taps, or a slow recovery time can point to sediment or another water-heater issue. Brown or rusty water, however, can also indicate internal corrosion or deteriorating plumbing. That calls for diagnosis before opening the drain valve.
For property owners in Eastern Ontario who use well water, water treatment equipment can affect maintenance needs as well. A softener, iron filter, or other treatment system may improve water quality, but it does not eliminate the need to inspect the water heater and its connections.
What You Need Before Flushing the Tank
Set aside enough time for the water in the tank to cool. Water leaving a heater can be hot enough to cause serious burns, even if it does not look unusually hot. Do not start this job when people in the home will need hot water immediately afterward.
You will need a garden hose long enough to reach a suitable drain location, such as a floor drain or exterior area where hot water will not damage landscaping or create icy conditions. Keep a bucket and towels nearby in case a hose connection drips. Gloves and closed-toe footwear are sensible protection when working around hot water and mechanical equipment.
Before proceeding, look at the area around the heater. If you see standing water, corrosion at the base, moisture around the temperature and pressure relief valve, or damaged venting on a gas-fired unit, stop and arrange for a qualified technician to inspect it. Do not flush a tank that already appears compromised.
How to Flush Water Heaters Step by Step
1. Turn off the energy source
For an electric water heater, turn off the correct breaker at the electrical panel. This step is essential. Heating elements can burn out if power remains on while the tank is drained.
For a gas water heater, set the gas control to the vacation or pilot setting, following the manufacturer’s instructions on the unit. Do not disconnect gas piping or attempt to relight a pilot if you smell gas or are unsure about the procedure. Leave that work to a licensed professional.
2. Shut off the cold-water supply
Close the cold-water shutoff valve above the water heater. This stops fresh water from continuously refilling the tank while it drains. If the valve is seized, leaking, or difficult to operate, do not force it. Older valves can fail when disturbed.
Open a nearby hot-water faucet, such as a bathtub tap. This helps relieve pressure and lets air into the system so the tank can drain more smoothly. Use a fixture that can safely handle warm water and leave it open during the process.
3. Connect a hose to the drain valve
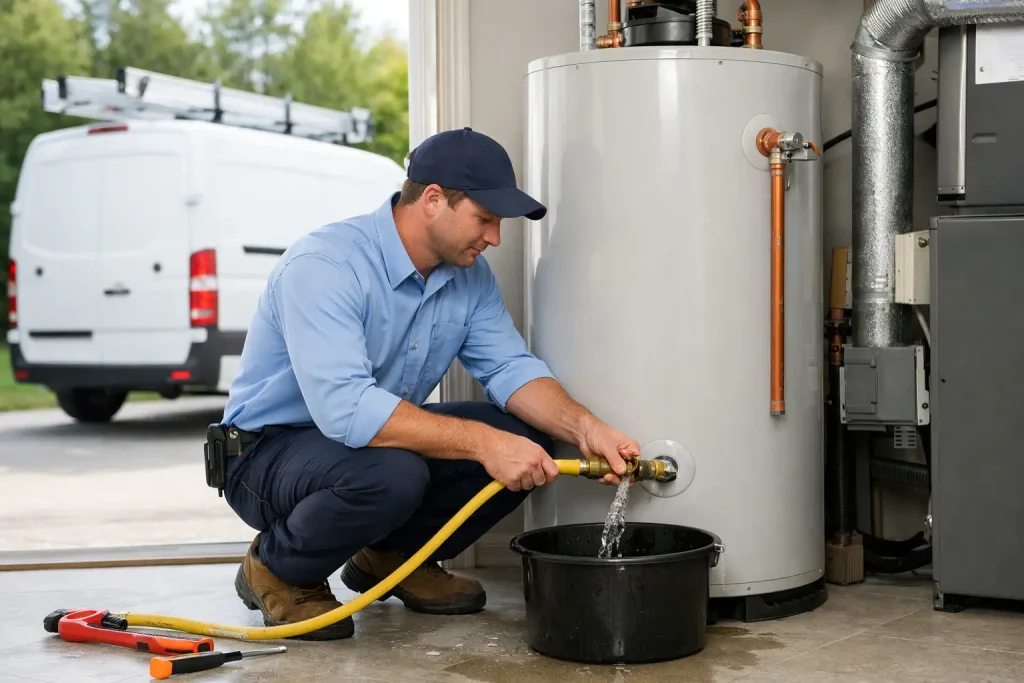
Thread a garden hose onto the drain valve near the bottom of the tank. Make sure the connection is snug, then run the other end to the drain location. Keep the hose as straight and downhill as possible. Kinks or an uphill run can slow drainage considerably.
Never direct hot discharge water into an area where someone could be burned, where it could damage finished surfaces, or where it could freeze. If you are draining into a utility sink, confirm that the sink, drain, and hose are stable before opening the valve.
4. Open the drain valve slowly
Open the drain valve gradually and watch the first flow of water. It may be hot, discolored, or contain fine sediment. Let the tank drain until the flow slows significantly or stops.
If water will not come out, sediment may be blocking the valve. Do not insert wires, screwdrivers, or other objects into the valve. Forcing a blockage can damage the valve or create a leak that will not reseal. A plumber can safely assess whether the valve can be cleared or should be replaced.
5. Flush until the water runs clearer
Once most of the tank has drained, briefly open the cold-water shutoff valve to stir up remaining loose sediment. Let water flow through the drain hose for a short period, then close the supply and allow the tank to drain again. Repeat this process until the discharge looks substantially clearer.
You do not need to chase perfectly clear water for an extended period. A tank with years of buildup may not release all sediment in one maintenance visit, and prolonged flushing can be unproductive if the drain valve is restricted. The goal is to remove what can be safely discharged without damaging the system.
6. Refill the tank before restoring power or heat
Close the drain valve firmly, but do not overtighten it. Remove the hose, then fully open the cold-water supply valve. Keep the nearby hot-water faucet open while the tank refills. When water flows steadily from that faucet without sputtering, most air has been pushed from the system.
Check the drain valve and surrounding connections for leaks. Only after the tank is completely full should you turn the breaker back on for an electric heater. For a gas unit, return the control to its normal setting according to the manufacturer’s instructions.
Common Problems to Avoid
The biggest mistake with an electric tank is restoring power before the tank is full. That can quickly damage the heating elements. Another common issue is opening the drain valve with no safe path for discharge water, which can lead to burns, water damage, or a flooded mechanical room.
Avoid using the temperature and pressure relief valve as a routine way to relieve pressure unless you understand the manufacturer’s procedure and the valve’s condition. This safety device protects the tank from dangerous pressure conditions, but an older valve may not reseat properly after being opened. If it begins dripping, needs replacement, or has a discharge pipe issue, arrange for service promptly.
Also be cautious with old plastic drain valves. They can become brittle with age. If the valve leaks after flushing, cap it only as a temporary measure and have the valve repaired. A slow leak can damage floors, insulation, and finished areas before it is noticed.
When to Call for Water Heater Service
A professional inspection is the better choice when a tank is more than several years old and has never been flushed, especially if there are signs of corrosion or a partially blocked drain valve. A technician can evaluate the anode rod, shutoff valves, relief valve, venting, electrical connections, and overall condition of the appliance while addressing sediment.
Call for service if you have no hot water after refilling, the tank is leaking, the relief valve is discharging, the drain valve will not close, or a gas water heater has venting concerns. These are not problems to work around. They require a safe diagnosis to protect the appliance and the home.
For homeowners managing a water heater issue alongside plumbing, electrical, or mechanical-room concerns, SDR Electric, Plumbing & Heating can help coordinate the right repairs and recommendations. A properly maintained tank should be quiet, reliable, and dry around its base. If yours is telling you otherwise, addressing the cause early is usually the safest next step.