A shower that drips after it is shut off, suddenly turns cold, or takes several turns before water flows is more than an everyday annoyance. It can point to a worn internal cartridge, a failed balancing component, or a valve body that has reached the end of its service life. This guide to shower valve replacement explains what the valve does, how to recognize a replacement-level problem, and why opening a shower wall is often a job best planned carefully.
What a shower valve actually controls
The shower valve sits behind the wall and controls the flow and temperature of water to the showerhead, tub spout, or both. The handle and trim plate are the visible parts. Behind them, the valve contains working components that mix hot and cold water and regulate how much water reaches the fixture.
Most modern showers use a pressure-balancing or thermostatic valve. A pressure-balancing valve helps limit sudden temperature changes when another fixture in the home is used. For example, if someone flushes a toilet while the shower is running, the valve reduces the chance of a sharp burst of hot water. A thermostatic valve offers more precise temperature control, although its service requirements and parts can differ by manufacturer.
A problem at the handle is not always a problem with the complete valve body. In many cases, a cartridge, stem, seal, or balancing spool can be repaired without replacing the valve behind the wall. The practical question is whether the existing valve can still accept reliable replacement parts and whether its condition supports a lasting repair.
Signs a shower valve needs attention
A steady drip from the showerhead after the water is turned off is one of the most common signs of a failing cartridge or seal. Low flow can also be related to the showerhead itself, mineral buildup, or a clogged filter, so it should not automatically be blamed on the valve.
Other symptoms are more likely to involve the shower valve:
- The water temperature swings from hot to cold without a change at the handle.
- The handle is difficult to turn, slips, or does not fully shut off the water.
- Hot and cold settings seem reversed or the handle no longer delivers a comfortable temperature range.
- Water leaks from behind the trim plate or stains appear on the wall or ceiling below the bathroom.
- The valve is an older model with unavailable, discontinued, or repeatedly failing parts.
A leaking trim plate deserves prompt attention. Water escaping behind the wall can damage drywall, framing, insulation, flooring, and adjacent rooms before it becomes visible. If the leak occurs only while the shower is on, the issue could also be a cracked pipe, loose connection, shower arm, or diverter connection. Proper troubleshooting prevents replacing a valve when the actual leak is elsewhere.
Guide to shower valve replacement: repair or replace?
The decision between repair and replacement depends on the valve’s age, manufacturer, condition, and access. If a known cartridge is available and the valve body is sound, replacing the cartridge may restore dependable operation with less disruption. This is commonly the right approach when the shower trim is in good condition and there are no signs of water damage behind the wall.
Replacement becomes the stronger choice when parts cannot be sourced, the valve body is corroded, the unit has been repaired repeatedly, or the bathroom is already being renovated. It can also make sense to replace an older valve that does not provide modern anti-scald protection. A new valve installed during a planned bathroom upgrade gives the homeowner an opportunity to update trim, improve temperature control, and ensure the rough-in plumbing is properly secured.
Access matters. A plumber may reach the valve through the finished shower wall, from a closet or room behind the shower, or through a carefully planned access panel. Opening the wall from the back often protects tile, acrylic surrounds, or other finished shower surfaces. However, that approach depends on the layout of the home and whether another finished area is located behind the valve.
What the replacement process involves
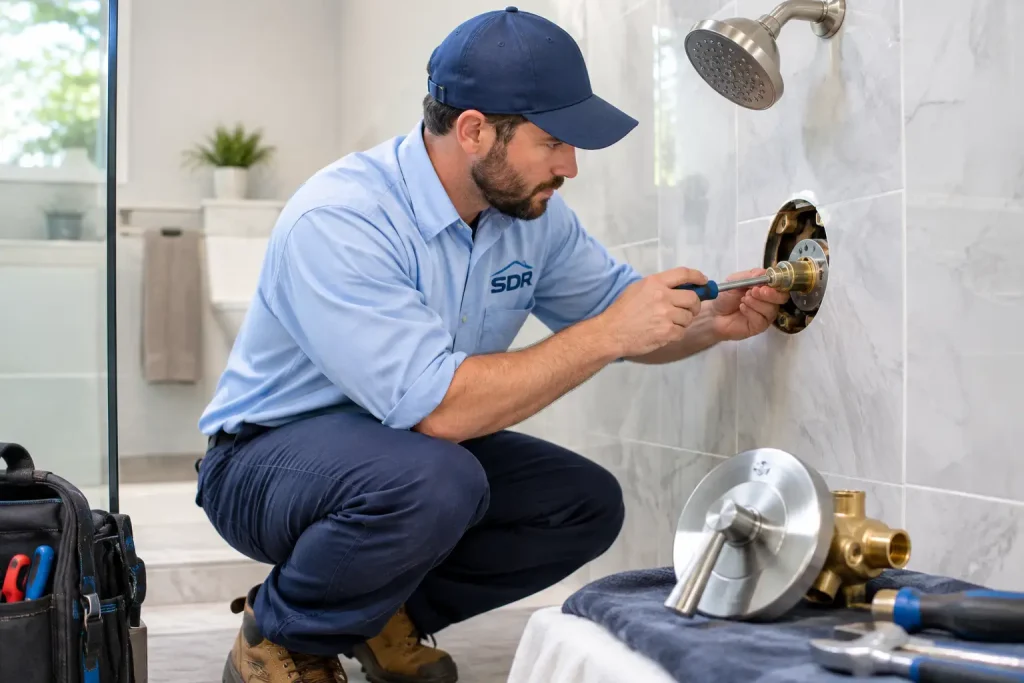
A shower valve replacement is not simply a matter of removing the handle and installing a new fixture. The valve body is connected to hot and cold supply lines, as well as the pipe leading to the showerhead and, where applicable, the tub spout. These connections must be cut, disconnected, or desoldered, then rebuilt to fit the new valve.
The work generally starts with shutting off the water supply and confirming that the lines are fully depressurized. The trim and handle are removed, and the plumber determines whether the existing opening provides enough room to remove the old valve and install the replacement. If needed, wall access is created in the least disruptive location.
The new valve must be mounted at the correct depth for the wall finish. This detail is easy to overlook but critical. If the valve sits too far forward or too far back, the trim may not fit correctly, the handle can bind, or the finished installation may look incomplete. The valve also needs solid backing so it does not shift when the handle is operated.
After connecting the plumbing, the system is pressure-tested for leaks before the wall is closed. The technician then installs the cartridge and trim, verifies hot and cold orientation, checks the anti-scald limit, and confirms smooth operation at the showerhead and tub spout. In a home with a water softener, filtration system, or well pump, it is also worth considering whether water quality or pressure concerns may be contributing to premature fixture wear.
Why valve compatibility is a major detail
Shower valves and trim are not universally interchangeable. The handle, trim kit, cartridge, and rough-in valve are usually designed to work within a specific manufacturer’s system and product line. A new decorative trim set may not fit an existing valve, even when the visible dimensions appear similar.
Before purchasing fixtures for a bathroom project, identify the existing brand and valve model if possible. Clear photos of the handle, trim, cartridge, and valve body can help, but hidden markings are sometimes needed for a reliable match. If the valve is being replaced, select the rough-in valve and trim together so the components are designed to work as a set.
This planning is especially useful during a renovation. Tile, wall panels, shower doors, and vanity placement can all affect access and finished dimensions. Coordinating plumbing work before wall finishes are installed avoids unnecessary rework later.
Safety and code considerations
Shower valve work affects concealed plumbing inside a finished wall, so small mistakes can become expensive water damage. Soldering near framing, connecting pipes without proper support, or failing to pressure-test joints creates risks that may not appear until after the wall is repaired.
Anti-scald protection is another key consideration. A properly installed and adjusted pressure-balancing or thermostatic valve helps protect children, older adults, and anyone using the shower from unexpected temperature changes. Local plumbing requirements may also apply to valve type, access, and installation methods, particularly during renovations or new construction.
For these reasons, homeowners can often handle simple tasks such as cleaning a showerhead or replacing a compatible handle, but a concealed valve replacement is generally best handled by a licensed plumbing professional. The work calls for accurate diagnosis, compatible materials, secure pipe connections, and a final leak test before the bathroom is put back into regular use.
Preparing for a plumbing visit
A few details can make diagnosis faster. Note whether the problem affects only one shower or other fixtures in the home. Pay attention to when the leak occurs: all the time, only with the shower running, or only when using the tub spout. If the water temperature changes, mention whether it happens when appliances or other fixtures are operating.
If you know the approximate age of the bathroom, previous repair history, or valve manufacturer, share that information. Also tell the plumbing team about finished tile, an acrylic surround, or a room located behind the shower wall. These details help determine the safest access strategy and whether a cartridge repair may be practical before opening the wall.
A shower valve should provide steady flow, predictable temperature, and a handle that works without force. When it does not, timely service can protect the bathroom around it as well as the plumbing inside the wall. For homeowners in Eastern Ontario, SDR Electric, Plumbing & Heating can assess the issue, explain the available repair or replacement path, and complete the work with the care a concealed plumbing repair requires.